Lets you control your directory and files.
Clicking on the file manager opens a new window. You can perform many commands
such as chmod, as-well-as editing your web pages.
 The File Manager allows you to manage your site through HTML, rather than an FTP
tool or other third-party application. You can upload, create or delete files,
organize files in folders, and change file permissions. While not as
sophisticated as most FTP tools, File Manager is free and gives you all the
basic functionality necessary to manage your site.
The File Manager allows you to manage your site through HTML, rather than an FTP
tool or other third-party application. You can upload, create or delete files,
organize files in folders, and change file permissions. While not as
sophisticated as most FTP tools, File Manager is free and gives you all the
basic functionality necessary to manage your site.
Note: All of the other topics
in this section assume that you are already in File Manager.
To open and navigate in File Manager:
- Click on the File Manager
button on the home page.
- Navigate by using the following:
- Open a folder by clicking on the folder
icon.
- Go up a level by clicking on the
Up one level link.
- Use the path links at the top of the
window to move up and down the path.
- Select a folder, so as to view or modify
its properties, by clicking on the folder name link.
Folders are a very useful way of adding
organization and structure to your web site. They make maintenance of the site
much easier, as you can easily see what files are in which folder. Most web
sites include at least an /image folder to keep all the image files separate
from the HTML files.
To create a new folder:
- Navigate to the area in which you will
create the new folder.
- Click on the Create New Folder
link.
- Enter the name of the new folder in the
available field in the top-left corner of the window.
- Click on the Create button.
The new folder will appear in the main display area.

You can use File Manager to upload files to
your web site, up to 12 files in one go. Although useful, a third-party FTP
client has many more features and does not limit you to the number of files you
can upload at one time. Refer to the
FTP Manager section
for more information.
To upload files in File Manager:
- Navigate to the folder where you want to
upload your files.
- Click on the Upload file(s)
link.
- Click on the Browse...
button next to one of the top fields.
- Search for and double-click on the first
file to upload.
- Repeat the above steps for each file you
want to upload.
- Click on the Overwrite existing
files tick box if you want to overwrite existing files of the same
name.
- Click on the Upload
button when you have finished selecting files. The status of the upload will
appear in the top-right corner of your window. The contents of the folder is
displayed in the main area, including your uploaded files.

For small text files it can be easier to create
them online, rather than on your home computer and uploading the file. You can
create text files, such as HTML, PHP, or plain TXT, but not binary files.
To create a new file:
- Navigate to the folder where you want to
create your text file.
- Click on the Create New File
link.
- Enter the name of the file to be created in
the available field in the top-right corner of your window. You do
need to add the file extension to the name, for example script.pl
for a Perl script, not just script.
- Select the type of document from the
drop-down list. Each type of file adds specific information to the text file:
- Text Document - No text
is added to the file.
- HTML Document - No text
is added to the file.
- Perl Script -
Automatically adds the path to Perl to the top of the file. Make sure to
double-check that the path is correct.
- Shell Script -
Automatically adds the path to the Shell executable to the top of the file.
Make sure to double-check that the path is correct.
- Click on the Create button.
The file has now been created and the display updated to show the new file.
Refer to Editing a
file to add text to these new files.
Editing a pre-existing file through File
Manager allows you to make immediate changes to your web site, without having to
upload a new version of the file. This is useful for small changes, but would be
inefficient for large alterations.
To edit a file:
- Navigate to the folder where the file is
located.
- Click on the name of the file.
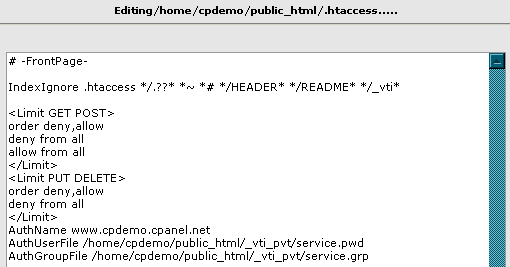
- Click on the Edit File link
in the top-right corner of your window. This will open a new window with the
contents of the file displayed.
Note: Clicking on the Show File link will
display the contents of the file. However, you will not be able to make any
changes to the file.
- Alter the text of the file as you wish.
- Click on the Save button
when you have finished altering the file. The file has been saved and any
changes will take effect from now on.
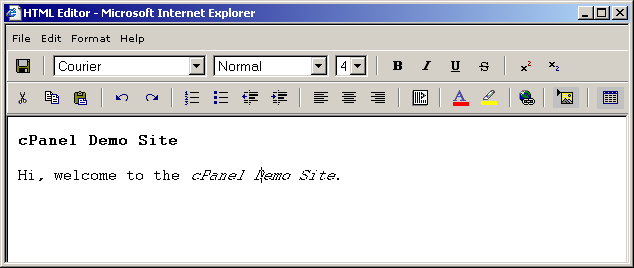
If you are using Internet Explorer 6 as your
web browser you can edit online HTML pages directly through the File Manager.
To edit a file using the HTML Editor:
- Navigate to the folder where the file is
located.
- Click on the name of the file.
- Click on the WYSIWYG Html Editor (IE
6 only) link in the top-right corner of your window. This will open a
new window with the contents of the file displayed.
- Edit the file in the same manner as using a
word processor.
- Click on the
 when
you have finished editing the file.
when
you have finished editing the file.
You can quickly rename a file or folder if you
originally labelled a file or folder with the wrong name, or if the name needs
to be updated. This is useful if a small number of files need to be changed,
since you do not need to upload any files for the changes to take effect, but
inefficient if you needed to rename your entire site.
To rename a file or folder:
- Navigate to the file or folder.
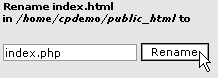
- Click on the Rename File
link in the top-right corner of your window.
- Enter the new name for the file or folder in
the text field. You need to enter an extension if it is a file, such as
.html for HTML files.
- Click on the Rename button.
The file name has now been changed and the display updated to show the
modified file.
All files on UNIX (including Linux and other
UNIX variants) machines have access permissions. These tell the operating system
how to deal with requests to access these files. There are three types of
access:
- Read - Denoted as r,
files with read access can be displayed to the user.
- Write - Denoted as
w, files with write access can be modified by the user.
- Execute - Denoted as
x, files with execute access can be executed as programs by
the user.
Access types are set for three types of user
group:
- User - The owner of the
file.
- Group - Other files which
are in the same folder or group.
- World - Everyone else.
The web server needs to be able to read your
web pages in order to be able to display them in a browser. The following
permissions need to be set in order for your web site to function properly.
- All HTML files and images need to be
readable by others. The setting for this is 644 (readable by User, Group, and
World, and writable by User), and is set automatically when you upload files.
- All folders need to be executable by others.
The setting for this is 755 (readable by User, Group, and World, writable by
User, executable by User, Group, and World), and is set automatically when you
create a folder.
- All CGI files (all files in the cgi-bin
folder) need to be executable by other. The setting for this is 755 (readable
by User, Group, and World, writable by User, executable by User, Group, and
World), and is not set automatically when you upload files.
You need to change file permissions manually. Refer to the
Introduction to
CGI topic for more information.
Warning: It is important that
none of your files or folders are writable by anyone else. Any file or folder
which is writable by others can be erased by them. Generally
there is no problem, just be careful how you set your permissions.
To change file or folder permissions:
- Navigate to the file or folder that you need
to change.
- Click on the name of the file or folder.
- Click on the Change Permissions
link in the top-right corner of the window.
- Click on as many tick boxes as you require
to create the right permission. The permission numbers underneath the tick
boxes will update automatically.
- Click on the Change button when you have
finished setting the permission. The new permission level has now been saved
and the display updated to show the modified file.
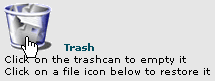
CPanel includes a Trash folder, which operates
the same way as the Windows Recycle Bin. All deleted files are automatically
placed in the Trash folder and can be restored to their original positions by a
simple click. However, once you empty the Trash folder, the files are
permanently deleted. Refer to
Emptying the Trash
for more information.
To delete a file or folder:
- Navigate to the file(s) or folder(s) that
you want to delete.
- Click on the name of the file or folder to
display the item's properties in the top-right corner of your window.
- Click on the Delete File
link. The deleted file or folder is now displayed in the Trash area. Refer to
Restoring
an item from the Trash if you deleted the wrong file or folder by
accident.
You can easily restore a deleted file from the
Trash by moving it from the Trash to another folder. Restored folders are
automatically moved back to their original location. However, you will not be
able to restore the item if you have emptied the Trash since deleting it - it
has been permanently destroyed.
To restore an item from the Trash:
- Click on the icon of the item that you want
to restore in the Trash area on the bottom-right of the window. The folder or
file will be automatically returned to its original location.
Warning: Make sure you do not
need any of the files or folders in the Trash before you empty it, because the
files are deleted permanently once the Trash is emptied.
To empty the Trash:
- Click on the Trash button
in the Trash area. All of the files in the Trash have now been permanently
deleted.